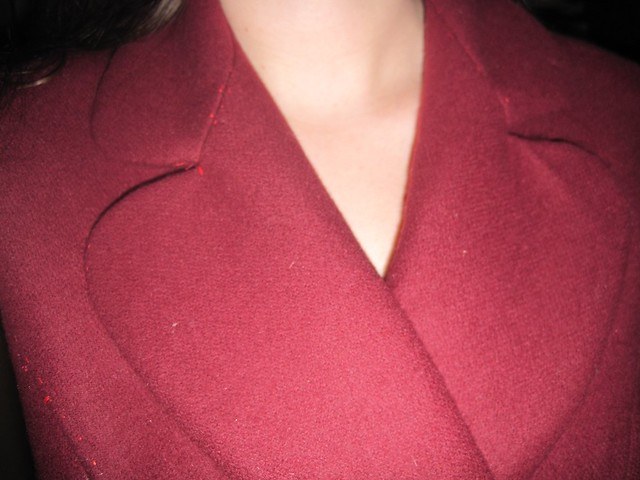
Making a coat is really, really time consuming. And hard. And fussy. But it's also a kind of magic--seeing the soft wool transform, molding it with the help of supportive devices and materials. It is incredible that all the ugly innards come together to create something so crisp and fitted. I certainly have a new kind of respect for all fine tailoring after this winter!
Let's start from the beginning. We were to make coats or blazers in my Advanced Pattern Development class this semester. The requirements were that it had to be wool, and had to have bound button holes, welt pockets, and a collar and lapel. I was heavily inspired by the burgundy coat I designed for my women's line in my class last semester, but I had to translate the design from embossed leather to wool, so some heavy-handed changes ensued. I eventually discarded the front panel and the zipper, but kept the essence of the design by keeping the leather and the snaps.
We started by draping a basic long-torso sloper on mannequins. From here, we transferred the drape to paper, mocked up a muslin of the pattern, made necessary fit alterations, fixed the pattern, and then altered the pattern to the size necessary for a coat, adding a collar, lapel, and sleeves. I settled on a double breasted design with a curved collar and lapel, and a two-piece sleeve. We mocked these up, fitting them to ourselves instead of to the dress forms. And then we mocked them up again. And again. And again. I think I made 4 1/2 muslins in total, perfecting the fit as I went.
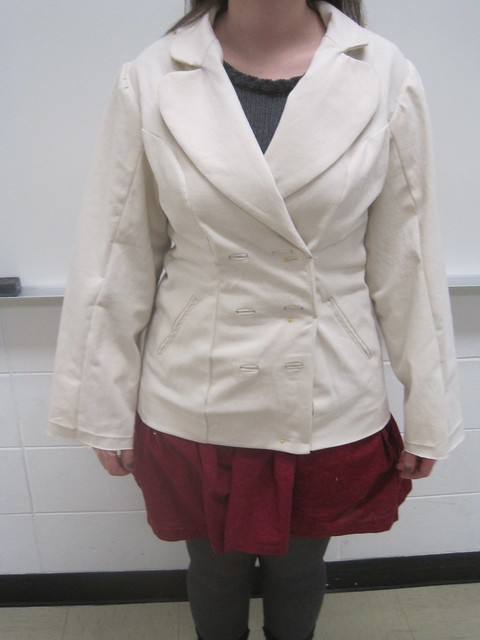
Here is one of my final muslins. It's a hideous thing, isn't it? All of those bound buttonholes were just for practice--yuck.
Just look at that sleeve! Terrible, I tell you.The shaded part of the pattern there is the alteration made to the sleeve to fix the fit.
Eventually, I got the pattern perfected enough to move on to the wool. I purchased two and a half yards of this beautiful burgundy 70% Wool 30% Cashmere Italian coating. It was $50 a yard--which is so, so not in my budget, but I was weak and it was all I had ever wanted in a fabric. It is luscious and soft and drapes beautifully and is just as perfect as can be. So I went for it, and I got white silk twill from Dharma Trading Co. to dye for the lining.
Before I could sew anything, we were told we had to thread trace the seam allowance and notches on all of the pieces. This took, oh, about twelve hours, and--can I be honest?--was the biggest waste of time, because after I did sew the thing together, I couldn't follow my original seam lines anyway! The pattern behaved differently in wool than in muslin, so it didn't matter where my seam line was in the end. Haha, I guess this is how you learn!
But then, after thread tracing, doing a baste-fit, and making necessary alterations, we could begin the real tailoring. Everything had to be interfaced, so I took apart my hand-basted garment. Instead of padstitching the entire garment, we were able to use fusible hair canvas interfacing. I still did my share of padstitching on the under collar with a bit of sew-in hair canvas, and let me tell you, that was enough for me! I am deluding myself into thinking that next time, I'll make a coat with a totally padstitched front and lapel. I'm sure I'll hate myself for it about six stitches in!
So, the body of the garment was interfaced with hair canvas, and the sleeves and facings with tricot. Then, I handstitched 1/8" twill tape along the edge of the lapels and front opening edge. I also stitched twill tape along the roll line, stretching the tape as I went, so that it had a natural roll that would last forever.
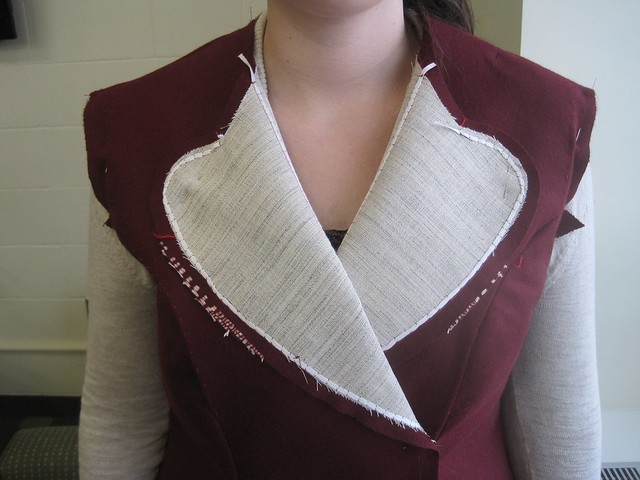
See those itty-bitty stitches? See how they all match up on either side? What, obsessive? Me? No way.
Many hours of handstitching later...
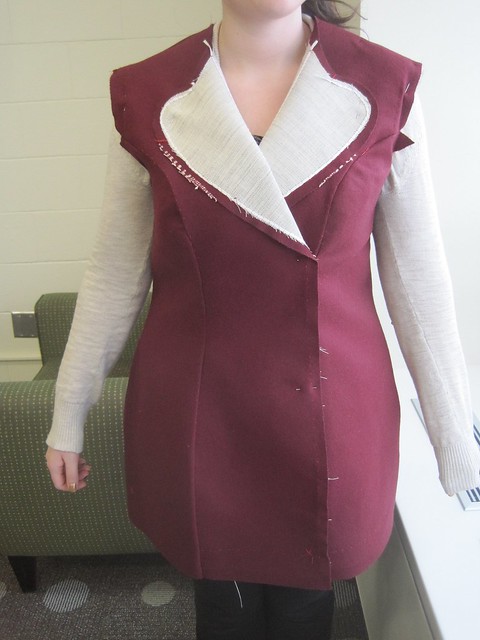
I sewed it for real!
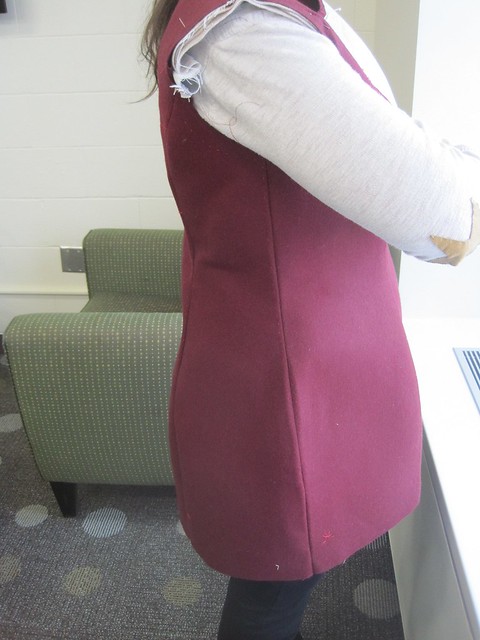
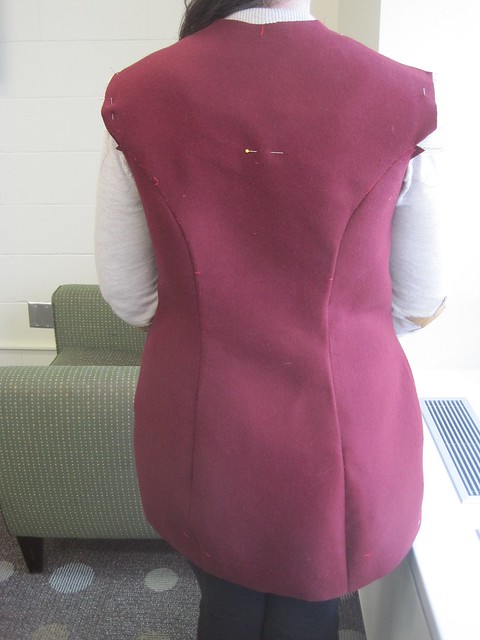
And then took it out again. Besides fixing that back princess seam--who knows what went wrong there?--I had to take it in a tad, because the seams didn't look good unless I caught 1/16" of the interfacing in the seam allowance. Trial and error, I tell you.
I went on a mad hunt to find a place to set my snaps for me, but I couldn't find any shop that would do it in the time frame I needed--and I really, really didn't want to leave my precious work with someone else for an extended period of time. I don't think anyone would have wanted me nervously hovering while they cut holes to set the snaps, which is surely what I would have insisted on! So, I bought a kit and did it myself, and probably angered a few people in my dorm with my hammering. Anyway, the snaps look great and seem like they'll hold forever, which was what I was worried about. However, I don't have any photos without showing the whole garment, so you'll just have to wait!
Other things I had to do for the garment were making shoulder pads and sleeve headers, and painting the lining an obnoxiously bright yellow. It turned out awesome!
Ah, but here I've spent way too long writing this post and not enough time working on my project! These photos are pretty lackluster, but I'll post some of the finished thing next time. Maybe I'll even include some runway photos! If you've made it this far in this novel of a post--thanks for reading, even when I'm so long-winded!


Looks good so far, and I admire your patience. I sew but I would probably have given up at a certain point. Good job!
ReplyDelete~Brit
www.brittany-sims.com
So neat to see the "Work In Progress" stages that this post displays. Excellent work! Can't wait to see/read the blog post that shows the final jacket. As always, Addie, so proud and thrilled with your accomplishments! Love, Mom
ReplyDelete