Showing posts with label tutorials. Show all posts

Wednesday, August 30, 2017

Cropped Linen Top (++ How to make it!)


Lately, I've been trying to work out of my stash, rather than ordering new fabric. This fabric is something I've held onto for about 5 years, so I suppose it was about time I use it. The reason I held onto it was that it was a gift from my first internship, working for a lady in Chicago. It was unpaid, but she gave me cuttings of some of her fabrics - really amazingly unique stuff. This is a double weave linen, a beautiful burnt orange color on one side and light tan on the reverse. It's loosely woven and crumples in the most delicious way, as linen often does. It also has a great sheen and iridescence. I decided to make an airy little high-low hem shirt with some frayed edges to take advantage of the looseness of the weave.  


As I've been trying to make more videos, I'm learning a lot about how much I need to improve what I'm explaining! Legitimately, guys? I have no idea what I'm doing in this tutorial-making-process. How fast is too fast to speed things up? Is it better to jump cut than to do 8x speed? Am I under-explaining or giving too much detail? These are the questions.

But I guess, maybe I'll get better with time.  Check it out - let me know what you think! 


Follow along:


Friday, August 25, 2017

Indigo Blue Handmade Dress (Plus a DIY Tutorial!)

While I hate getting dressed up in my day-to-day life (hi, leggings), I do really love the occasion to get fancy and have a good time - as long as it is occasional. This, I will note, is a huge shift from my style about 6 or 8 years ago (history of which is well documented on this blog). I used to love wearing heels - when I had nowhere to walk to. Now, comfortable shoes dominate my life, and tight dresses kind of make my stomach hurt. Is this what getting older feels like? If so, I'm into it. Comfort all the way, please!


That said, we have 3 weddings to attend this fall, and I'm a huge fan of getting dressed up for weddings, because they don't come around all that often. And if you're wearing heels, it's usually just for a few hours. (Spoiler alert: I don't wear heels even then.) But due to my style and taste changing, weight loss, and finding different priorities to ask of my clothing, I don't really have much wedding-appropriate attire. So obviously, I need to make a few dresses between now and November. :)


This is a little dress I made over the course of a weekend out of some lovely indigo-dyed cotton twill. I got the fabric in Chicago at the same place I picked up the fabric for this other dress - along with lots of other fabric you'll see being used sooner or later. I think all told this dress cost me about $5 in materials.


Part of the reason this dress came together so quickly was that I was using pattern pieces from my wedding dress! Having a princess seamed pattern that fits well makes designing so much quicker - I just frankensteined the pieces a little bit to make this high-necked sleeveless cut and low back.


And of course, it has pockets! If you're making your own clothes, putting in pockets is a must. 


Okay and finally.... here is a tutorial for it! I'm working on improving my video skills, and I think I can get a lot better at explaining how to do things. But I want to learn by doing, so I'm going to probably keep making imperfect tutorials and get better as I go! Hope you enjoy and maybe learn something! :)

Sunday, July 23, 2017

Workout Tank Tutorial + Pure Barre Love


girl workout tanktop diy tshirt reconstruction fitness inspo fitspo inspiration sewing handmade recon workout gear clothing cutout back racerback topknot pure barre

I don't think I've talked about it on here much or at all, but over the last few years (post-college) I have been working hard to cultivate a lot of healthy habits. This ranges from sleep quality + quantity to nutrition to water intake, but my favorite is absolutely my newfound love of fitness. 

Let me take a few steps back: a few years ago, I knew nothing about working out. I would dabble in jogging and yoga or pilates videos, but nothing stuck because I never enjoyed any of it, and I could never get myself to work through that initial soreness that comes from working out the first time. And then I graduated, and got an office job, and realized I had to find a way to move intentionally, because the majority of my day was spent sitting on a computer. So a few months into my job, I joined a gym through work and went with a friend to a Zumba class. I loved it. We went back, often, and went to all sorts of other classes: the kind where you do burpees, jump up and down from steps, and try not to throw up. And - man, I didn't love the burpees, but I had realized that group fitness was 100% my thing.

This led me to sign up for a Pure Barre class with another friend, in March of last year. At that point, I had lost weight, gained muscle, and felt pretty good about my fitness capabilities. I figured I'd be able to handle a barre class, no sweat. 

I was so wrong. There was a LOT of sweat. It was really, really hard. My muscles were shaking like Jell-o Jigglers, and I was so confused about what to do for many parts of class, and it was really painful in a really great way. I immediately signed up for a month package, mostly because I just wanted to get better at this crazy class. Additionally, everyone at the studio was kind, friendly, and it was the best workout atmosphere I had ever experienced. I couldn't get enough!

girl workout tanktop diy tshirt reconstruction fitness inspo fitspo inspiration sewing handmade recon workout gear clothing cutout back racerback topknot pure barre
4 months of Pure Barre, comparison photos.

And now, almost a year and a half later, I am more obsessed than ever. I go every day. At 6 A.M. I never thought I would be that kind of person. But I am so much healthier, happier, and energetic for it. It makes me a nicer person. I've made amazing friends there, and I look forward all day long to the class the next morning. And to be perfectly straight forward, the results help keep me going. The changes in my muscles are so fun to watch, and I love knowing I'm strong enough to do most anything I need to. Almost 300 classes in and no signs of stopping!

girl workout tanktop diy tshirt reconstruction fitness inspo fitspo inspiration sewing handmade recon workout gear clothing cutout back racerback topknot pure barre before and after beforeandafter gains muscle building bicep tricep lats
January 2017 > June 2017, Pure Barre nearly every day. 

girl workout tanktop diy tshirt reconstruction fitness inspo fitspo inspiration sewing handmade recon workout gear clothing cutout back racerback topknot pure barre before and after beforeandafter gains muscle building bicep tricep lats
December 2014 > May 2017
 So now that I have gushed about barre long enough to totally lose y'all, let's get to the meat and potatoes of this post. I do a lot of workout laundry, and I have even been wearing things out. I want to endeavor to make more of my workout wardrobe, because that stuff is expensive. I also want to share more tutorials with you all, so this seemed like a perfect opportunity to dive in.

I made this out of an old t-shirt that was a little too stretched out and pilled for daily wear, but would be completely acceptable for working out in. This took me, even with filming, less than an hour to put together. It has been years since I have done a t-shirt reconstruction, but I think I might have to get back into it. The results are so gratifying, and it is so quick to do! Plus - it's FREE.

girl workout tanktop diy tshirt reconstruction fitness inspo fitspo inspiration sewing handmade recon workout gear clothing cutout back racerback topknot pure barre before and after beforeandafter gains muscle building bicep tricep lats tutorial how to instructions how to sew howtosew

girl workout tanktop diy tshirt reconstruction fitness inspo fitspo inspiration sewing handmade recon workout gear clothing cutout back racerback topknot pure barre before and after beforeandafter gains muscle building bicep tricep lats tutorial how to instructions how to sew howtosew

So check out the video, and let me know if you make one! Also feel free to let me know if there is anything you'd like to see me make a tutorial for. Now that I'm not planning a wedding, I have a lot more time to rediscover all my other hobbies!


sewing tutorial workout tank diy how to sew how to make a tank top how to make a crop top fashion design clothing tshirt surgery reconstruction strength muscle fitgirls fitness nutrition pure barre before and after weightloss journey weight watchers myfitnesspal

Follow along:


Sunday, February 7, 2016

Tutorial: How to Knit a Slouchy Beanie with Colorblocking - Roving

hat knitting tutorial diy craft how to knit a hat maker make makers gonna make handmade fashion chunky roving giant knit fluffy colorblocked wool made in the usa i made this clothing refashion

Apologies for the unintentional hiatus! January got away from me, in a good kind of way. I finished up a few projects (including this shirt! I'll post it soon!), traveled to Baltimore during their big blizzard, and got a new cat (!). Happy February!

hat knitting tutorial diy craft how to knit a hat maker make makers gonna make handmade fashion chunky roving giant knit fluffy colorblocked wool made in the usa i made this clothing refashion

This is a tutorial for a chunky knit roving hat with colorblocking. It is super simple and fast and fun! I also cannot decide if I even like the hat or not, haha! I ran out of the blue, and I think I would like it more if it had more than a smidge of blue at the end. But you know, you win some and you lose some.

Because this is hat is knit with roving, the first thing you'll need to do is make your yarn! You can do this following my instructions in my previous tutorial, for the giant knit cowl. You will need to divide and set a slight twist into the roving to create your yarn:

hat knitting tutorial diy craft how to knit a hat maker make makers gonna make handmade fashion chunky roving giant knit fluffy colorblocked wool made in the usa i made this clothing refashion

You can learn the details of that technique HERE!

Okay, so for this project, you'll need about 100 grams of roving, or two skeins of Knitpick's roving.  You can really use any roving that's combed into a long strand. Here I used some creamy white roving, and some beautiful sapphire blue Knitpick's Wool of the Andes roving, left over from other projects. You can adjust your colorblocking to be any length, or you can skip it altogether! 

hat knitting tutorial diy craft how to knit a hat maker make makers gonna make handmade fashion chunky roving giant knit fluffy colorblocked wool made in the usa i made this clothing refashion

You will also need size 50 (25 mm) circular knitting needles. I like these ones from Knitter's Pride

With you main color, start by casting on 16 stitches, using the long-tail cast-on method.

hat knitting tutorial diy craft how to knit a hat maker make makers gonna make handmade fashion chunky roving giant knit fluffy colorblocked wool made in the usa i made this clothing refashion

Join in the round.

hat knitting tutorial diy craft how to knit a hat maker make makers gonna make handmade fashion chunky roving giant knit fluffy colorblocked wool made in the usa i made this clothing refashion

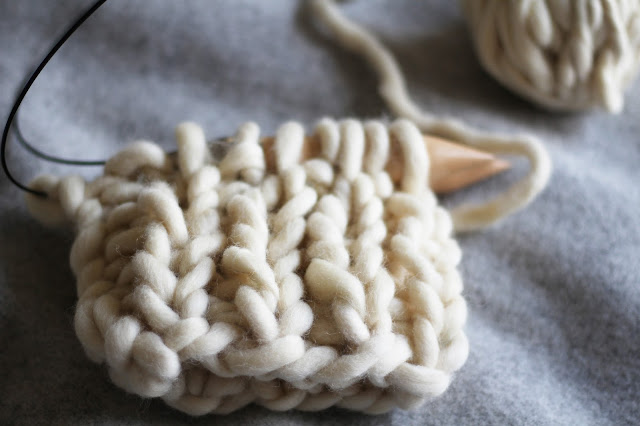
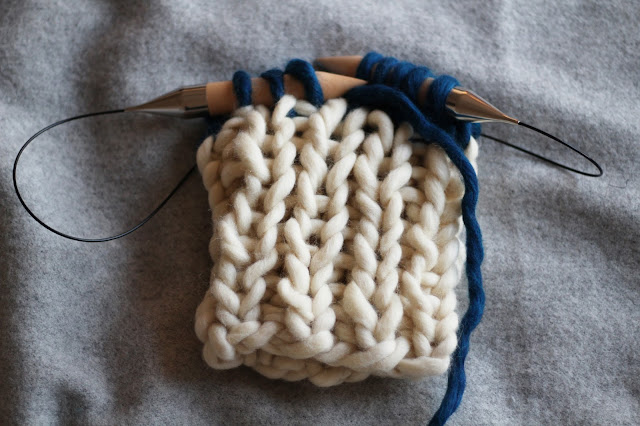
Begin to knit 1x1 rib.

hat knitting tutorial diy craft how to knit a hat maker make makers gonna make handmade fashion chunky roving giant knit fluffy colorblocked wool made in the usa i made this clothing refashion

hat knitting tutorial diy craft how to knit a hat maker make makers gonna make handmade fashion chunky roving giant knit fluffy colorblocked wool made in the usa i made this clothing refashion

Splice your yarn as necessary!

hat knitting tutorial diy craft how to knit a hat maker make makers gonna make handmade fashion chunky roving giant knit fluffy colorblocked wool made in the usa i made this clothing refashion

Watch it (quickly!) grow...

hat knitting tutorial diy craft how to knit a hat maker make makers gonna make handmade fashion chunky roving giant knit fluffy colorblocked wool made in the usa i made this clothing refashion

Knit in rib for 8 rounds (or desired amount). Switch to your second color:

hat knitting tutorial diy craft how to knit a hat maker make makers gonna make handmade fashion chunky roving giant knit fluffy colorblocked wool made in the usa i made this clothing refashion

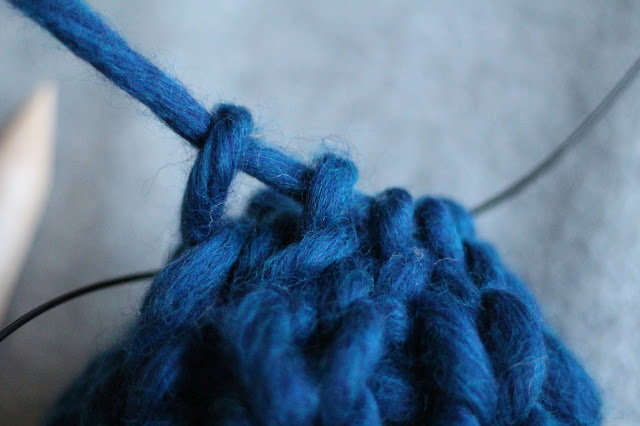
Proceed in 1x1 rib for two more rounds.

hat knitting tutorial diy craft how to knit a hat maker make makers gonna make handmade fashion chunky roving giant knit fluffy colorblocked wool made in the usa i made this clothing refashion

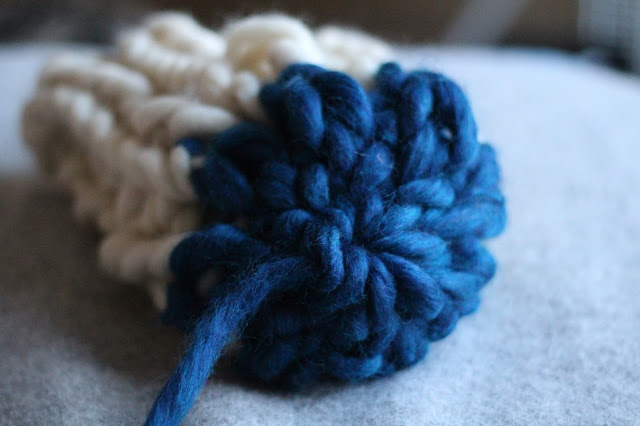
On round 11, k2tog 8 times. 8 sts remaining.

hat knitting tutorial diy craft how to knit a hat maker make makers gonna make handmade fashion chunky roving giant knit fluffy colorblocked wool made in the usa i made this clothing refashion

Pull your loose end through the 8 remaining stitches.

hat knitting tutorial diy craft how to knit a hat maker make makers gonna make handmade fashion chunky roving giant knit fluffy colorblocked wool made in the usa i made this clothing refashion

Pull tightly, tie a knot, and weave in all loose ends.

hat knitting tutorial diy craft how to knit a hat maker make makers gonna make handmade fashion chunky roving giant knit fluffy colorblocked wool made in the usa i made this clothing refashion

How easy was that?! Even with spinning the roving, this can easily be done in a couple hours! It is one-size-fits-most, and you can easily increase or decrease as needed. For reference, I have a 22 1/2" head circumference (pretty standard).

hat knitting tutorial diy craft how to knit a hat maker make makers gonna make handmade fashion chunky roving giant knit fluffy colorblocked wool made in the usa i made this clothing refashion

This is so easily customizable, and I think would look really cute with different amounts of colorblocking, or stripes, or no colorblocking! You do you!

hat knitting tutorial diy craft how to knit a hat maker make makers gonna make handmade fashion chunky roving giant knit fluffy colorblocked wool made in the usa i made this clothing refashion

hat knitting tutorial diy craft how to knit a hat maker make makers gonna make handmade fashion chunky roving giant knit fluffy colorblocked wool made in the usa i made this clothing refashion beanie slouchy hipster hat winter cold weather gear

Here is the Ravelry link - add me, heart it up, all of that good stuff. I would love to see photos if you make this! Thanks for reading through! 

hat knitting tutorial diy craft how to knit a hat maker make makers gonna make handmade fashion chunky roving giant knit fluffy colorblocked wool made in the usa i made this clothing refashion beanie slouchy hipster hat winter cold weather gear

Thursday, November 26, 2015

DIY Chunky Knit Cowl Tutorial


Happy Thanksgiving! Hope you're having a happy holiday with your family! This is the warmest November I can ever remember having, and it is so totally bizarre to not have snow right now. Granted, I am spending the holiday in Milwaukee, and there is probably some semblance of snow at home in northern Minnesota. But here, there is still green grass (what?!) and it is raining right now. I miss gently falling snow and frosty breath! I'd love a little more cold weather right now. More excuses to weather fluffy wool? Yes, please.

And speaking of fluffy wool, here is a project to keep your hands busy! Every year growing up, on the Friday after Thanksgiving, my mom would invite our cabin guests and neighbors to join us making hand-dipped beeswax candles in our kitchen. I love the tradition of making something with your hands on a day driven by rampant consumerism. So maybe, make something tomorrow!

These instructions are for one cowl, measuring 30" in circumference and 10" in height. I used three skeins of Knitpicks' Bare Gloss Roving, which is blend of merino wool and Tussah silk. (YUM.) I had a little left over, so you could probably make your cowl slightly taller, depending on your tension. You're also going to need size 50 (25 mm) circular knitting needles -- I got mine from Amazon. 


Your first step is going to be splitting the roving and spinning it. Depending on the roving you use, you might need to split it differently. I was working with 100 gram skeins, so I divided it into 25 gram pieces. I used around 50 yards of the final spun yarn, so use that as a general rule of thumb when selecting your roving or yarn.


First, divide the skein in two.


Divide once more, carefully splitting the fibers evenly. Your cowl will have a slight thick-and-thin appearance regardless, but it's easier to work with consistent size yarn.


You'll have these four hanks for each skein. You'll need to do this for all three skeins of roving.


Next, set a light twist in the roving. Start with one hank, and spin it with your hand, or by rolling the roving against your leg. This gives it a nice twist for strength, and prevents the fibers from clinging freely to everything.


As you spin, begin to wrap your new yarn around your hand to contain it, and to prevent it from loosing its twist.


You'll soon need to join separate hanks. Take the two tapered ends and overlap them, twisting them together so they latch on to each other. Because this is such a light twist, it is not a very strong join, so you'll have to use caution when you are knitting the yarn, otherwise they will disconnect.


Keep on spinning until you have your little ball of yarn. Now you're ready to begin!


Using the long-tail method, cast on 32 stitches and join in the round.


I prefer to use the magic loop method to knit in the round, but if your cable isn't long enough, you can simply knit in a continuous circle.


When you knit your first few stitches, carry your loose end with your working yarn to weave in the end.


Continue to knit in stockinette for 13 rounds.


It's so much fun to watch this cowl grow, because it happens so quickly!


After 13 rounds, bind off all stitches knitwise.


Weave in the loose end with your fingers.


Steam if desired. Because it is all jersey (stockinette) the edges will curl slightly while wearing. If you wish to steam it in between wears, it will help to keep it full and flat.

Here's an abbreviated pattern for you:

CO 32 sts
Connect in the round
K13 rds

BO all sts knit wise
Weave in ends


I would love to see photos if you make this for yourself! Feel free to email me or tag me on Instagram (@addie__marie). I'm also selling this HERE, if you are interested!